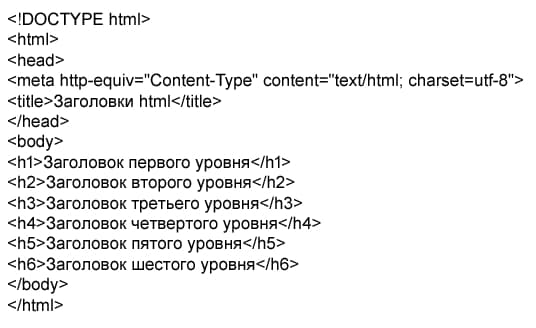
Html тег
Содержание:
- Textarea Object Properties
- TextArea Placeholder | Hint
- Атрибуты
- Как добавить стиль к тегу <textarea> ?
- HTML TextArea Value
- Definition and Usage
- JavaScript
- JavaScript
- HTML Read Only Text Areas:
- HTML — Text Areas: Disabled
- HTML Code:
- Disabled Textareas:
- HTML Text Area No Word Wrap:
- HTML — Text Areas: Readonly
- HTML Readonly Attribute:
- HTML Read Only Text Areas:
- HTML — Text Areas: Disabled
- HTML Code:
- Disabled Textareas:
- Трюки с textarea
- 1. Изображение в качестве фона, которое пропадает при вводе текста.
- 2. Placeholder в HTML5
- 3. Placeholder, HTML5 с поддержкой старых браузеров используя jQuery
- 4. Удаляем обводку textarea
- 5. Запрет изменения размера
- 6. Добавление возможности изменения размера
- 7. Изменение размера под содержимое
- 8. Nowrap
- 9. Удаляем скролл-бары в IE
- Получение значения из поля textarea -> javascript
- А теперь подробнее
- :focus State Styles#
Textarea Object Properties
| Property | Description |
|---|---|
| autofocus | Sets or returns whether a text area should automatically get focus when the page loads |
| cols | Sets or returns the value of the cols attribute of a text area |
| defaultValue | Sets or returns the default value of a text area |
| disabled | Sets or returns whether the text area is disabled, or not |
| form | Returns a reference to the form that contains the text area |
| maxLength | Sets or returns the value of the maxlength attribute of a text area |
| name | Sets or returns the value of the name attribute of a text area |
| placeholder | Sets or returns the value of the placeholder attribute of a text area |
| readOnly | Sets or returns whether the contents of a text area is read-only |
| required | Sets or returns whether the text area must be filled out before submitting a form |
| rows | Sets or returns the value of the rows attribute of a text area |
| type | Returns the type of the form element the text area is |
| value | Sets or returns the contents of a text area |
| wrap | Sets or returns the value of the wrap attribute of a text area |
TextArea Placeholder | Hint
An HTML TextArea Placeholders help to user understand what value will come here. Mena’s user gets easily hint about it what content he has to enter this TextArea. See the below example it. You need to use the PlaceHolder attribute in the TextArea input tag.
Output: A GIF image of how the placeholder will show a hint to the user. But when you start entering text, it will go.
<!DOCTYPE html>
<html>
<body>
<h1>HTML TextArea Input</h1>
<textarea id=»tutorial» name=»tutorial» rows=»5″ cols=»40″ placeholder=»Enter you comment here»></textarea>
</body>
</html>
|
1 |
<!DOCTYPE html> <html> <body> <h1>HTML TextArea Input<h1> <textarea id=»tutorial»name=»tutorial»rows=»5″cols=»40″placeholder=»Enter you comment here»><textarea> <body> <html> |
Атрибуты
| Атрибут | Значение | Описание |
|---|---|---|
| autocomplete | onoff | Определяет, может ли содержимое элемента быть автоматически дополнено браузером (автозаполнение). |
| autofocus | autofocus | Указывает, что текстовая область должна автоматически получать фокус при загрузке страницы. |
| cols | number | Определяет видимую ширину текстовой области (в символах). Значение по умолчанию 20 символов. |
| dirname | textareaname.dir | Определяет и передает на сервер направление текста. |
| disabled | disabled | Логический атрибут, указывающий, что текстовая область должна быть отключена. |
| form | form_id | Определяет одну или несколько форм, к которым принадлежит элемент и связывает их при помощи идентификатора (id). |
| maxlenght | number | Указывает максимальное количество символов, которое может содержать текстовая область. |
| minlength | number | Указывает минимальное количество символов, которое может содержать текстовая область. |
| name | text | Определяет имя текстового поля. |
| placeholder | text | Указывает текст подсказки, которая описывает ожидаемое значение для ввода пользователем в элемент. Подсказка отображается в пустом текстовом поле, и исчезнет при получение им фокуса. |
| readonly | readonly | Указывает, что текстовая область доступна только для чтения. |
| required | required | Логический атрибут, указывающий, что текстовая область должна быть заполнена перед отправлением формы. |
| rows | number | Определяет видимое количество строк в текстовой области. Значение по умолчанию 2 символа. |
| wrap | Определяет, как текст должен быть перенесен, когда отправляется форма. | |
| soft | -(значение по умолчанию) текст отправляется одной сплошной строкой без добавления дополнительных переносов строк. | |
| hard | -браузер автоматически вставляет разрывы строки так, что каждая строка не будет шире текстового поля. Используется только если установлен атрибут cols. |
Тег <textarea> поддерживает также глобальные атрибуты и атрибуты событий.
Как добавить стиль к тегу <textarea> ?
Цвет текста внутри тега <textarea>:
- CSS свойство color определяет цвет контента и оформления текста.
- CSS свойство background-color устанавливает фоновый цвет элемента.
Стили форматирования текста для тега <textarea>:
- CSS свойство text-indent указывает размер отступа первой строки в текстовом блоке.
- CSS свойство text-overflow указывает, как будет отображаться пользователю строчный текст, выходящий за границы блока.
- CSS свойство white-space указывает, как будут отображены пробелы внутри элемента.
- CSS свойство word-break указывает перенос строки.
Другие свойства для тега <textarea>:
- CSS свойство text-shadow добавляет тень к тексту.
- CSS свойство text-align-last выравнивает последнюю строку текста.
- CSS свойство line-height устанавливает межстрочный интервал.
- CSS свойство letter-spacing устанавливает расстояние между буквами/символами в тексте.
- CSS свойство word-spacing устанавливает расстояние между словами в тексте.
HTML TextArea Value
A without Getting HTML Textarea value is not useful until TextArea is ReadOnly.
See the below HTML TextArea Value Attribute code.
textareaObject.value
| 1 | textareaObject.value |
You can set the HTML TextArea Default Value by adding content (text) between opening and closing of <TextArea> tag. Like a below example code.
<textarea name=»df»>Default value</textarea>
| 1 | <textarea name=»df»>Defaultvalue<textarea> |
A Complete example of get the <TextArea> tag user entered value.
<!DOCTYPE html>
<html>
<body>
<h1>HTML TextArea Input</h1>
<textarea id=»address»>
42 Link Road
Bangalore</textarea>
<button type=»button» onclick=»myFunction()»>Try it</button>
<p id=»demo»></p>
<script>
function myFunction() {
var x = document.getElementById(«address»).value;
document.getElementById(«demo»).innerHTML = x;
}
</script>
</body>
</html>
|
1 |
<!DOCTYPE html> <html> <body> <h1>HTML TextArea Input<h1> <textarea id=»address»> 42Link Road Bangalore<textarea> <button type=»button»onclick=»myFunction()»>Tryit<button> <pid=»demo»><p> <script> functionmyFunction(){ varx=document.getElementById(«address»).value; document.getElementById(«demo»).innerHTML=x; } </script> <body> <html> |
Output: See below GIF how output will look.
Definition and Usage
The tag defines a multi-line text input control.
The element is often used in a form, to collect user inputs
like comments or reviews.
A text area can hold an unlimited number of characters, and the text renders in a fixed-width font (usually Courier).
The size of a text area is specified by the and attributes
(or with CSS).
The attribute is needed to reference
the form data after the form is submitted (if you omit the attribute, no data from the text area will be submitted).
The attribute is needed to associate the
text area with a label.
Tip: Always add the <label> tag
for best accessibility practices!
JavaScript
JS Array
concat()
constructor
copyWithin()
entries()
every()
fill()
filter()
find()
findIndex()
forEach()
from()
includes()
indexOf()
isArray()
join()
keys()
length
lastIndexOf()
map()
pop()
prototype
push()
reduce()
reduceRight()
reverse()
shift()
slice()
some()
sort()
splice()
toString()
unshift()
valueOf()
JS Boolean
constructor
prototype
toString()
valueOf()
JS Classes
constructor()
extends
static
super
JS Date
constructor
getDate()
getDay()
getFullYear()
getHours()
getMilliseconds()
getMinutes()
getMonth()
getSeconds()
getTime()
getTimezoneOffset()
getUTCDate()
getUTCDay()
getUTCFullYear()
getUTCHours()
getUTCMilliseconds()
getUTCMinutes()
getUTCMonth()
getUTCSeconds()
now()
parse()
prototype
setDate()
setFullYear()
setHours()
setMilliseconds()
setMinutes()
setMonth()
setSeconds()
setTime()
setUTCDate()
setUTCFullYear()
setUTCHours()
setUTCMilliseconds()
setUTCMinutes()
setUTCMonth()
setUTCSeconds()
toDateString()
toISOString()
toJSON()
toLocaleDateString()
toLocaleTimeString()
toLocaleString()
toString()
toTimeString()
toUTCString()
UTC()
valueOf()
JS Error
name
message
JS Global
decodeURI()
decodeURIComponent()
encodeURI()
encodeURIComponent()
escape()
eval()
Infinity
isFinite()
isNaN()
NaN
Number()
parseFloat()
parseInt()
String()
undefined
unescape()
JS JSON
parse()
stringify()
JS Math
abs()
acos()
acosh()
asin()
asinh()
atan()
atan2()
atanh()
cbrt()
ceil()
clz32()
cos()
cosh()
E
exp()
expm1()
floor()
fround()
LN2
LN10
log()
log10()
log1p()
log2()
LOG2E
LOG10E
max()
min()
PI
pow()
random()
round()
sign()
sin()
sqrt()
SQRT1_2
SQRT2
tan()
tanh()
trunc()
JS Number
constructor
isFinite()
isInteger()
isNaN()
isSafeInteger()
MAX_VALUE
MIN_VALUE
NEGATIVE_INFINITY
NaN
POSITIVE_INFINITY
prototype
toExponential()
toFixed()
toLocaleString()
toPrecision()
toString()
valueOf()
JS OperatorsJS RegExp
constructor
compile()
exec()
g
global
i
ignoreCase
lastIndex
m
multiline
n+
n*
n?
n{X}
n{X,Y}
n{X,}
n$
^n
?=n
?!n
source
test()
toString()
(x|y)
.
\w
\W
\d
\D
\s
\S
\b
\B
\0
\n
\f
\r
\t
\v
\xxx
\xdd
\uxxxx
JS Statements
break
class
continue
debugger
do…while
for
for…in
for…of
function
if…else
return
switch
throw
try…catch
var
while
JS String
charAt()
charCodeAt()
concat()
constructor
endsWith()
fromCharCode()
includes()
indexOf()
lastIndexOf()
length
localeCompare()
match()
prototype
repeat()
replace()
search()
slice()
split()
startsWith()
substr()
substring()
toLocaleLowerCase()
toLocaleUpperCase()
toLowerCase()
toString()
toUpperCase()
trim()
valueOf()
HTML Read Only Text Areas:
As you can see many times word wrapping is often the desired look for your text areas. Since it makes everything nice and easy to read.
This read-only behavior allows a web surfer to see and highlight the text inside the element, but he or she cannot alter it in any way. When highlighted, the user may also Copy (Ctrl + C on a PC, Ctrl-Click on a Mac) the text to local clipboard and paste it anywhere he/she pleases.
HTML — Text Areas: Disabled
Disabling the textarea altogether prevents the surfer from highlighting, copying, or modifying the field in any way. To accomplish this, set the disabled property to «yes».
HTML Code:
<textarea cols="20" rows="5" wrap="hard" >
As you can see many times word wrapping is often the desired look for your text areas. Since it makes everything nice and easy to read.</textarea>
Disabled Textareas:
As you can see many times word wrapping is often the desired look for your text areas. Since it makes everything nice and easy to read.
Keep in mind that just because users are unable to copy from the screen directly doesn’t prevent them from taking a screen capture or extracting the data from the source code. Disabling the textarea offers no security whatsoever.
- Continue
HTML Text Area No Word Wrap:
As you can see many times word wrapping is often the desired look for your text areas. Since it makes everything nice and easy to read.
HTML — Text Areas: Readonly
Setting a «yes» or «no» value for the readonly attribute determines whether or not a viewer has permission to manipulate the text inside the text field.
HTML Readonly Attribute:
<textarea cols="20" rows="5" wrap="hard" >
As you can see many times word wrapping is often the desired look for your text areas. Since it makes everything nice and easy to read.
</textarea>
HTML Read Only Text Areas:
As you can see many times word wrapping is often the desired look for your text areas. Since it makes everything nice and easy to read.
This read-only behavior allows a web surfer to see and highlight the text inside the element, but he or she cannot alter it in any way. When highlighted, the user may also Copy (Ctrl + C on a PC, Ctrl-Click on a Mac) the text to local clipboard and paste it anywhere he/she pleases.
HTML — Text Areas: Disabled
Disabling the textarea altogether prevents the surfer from highlighting, copying, or modifying the field in any way. To accomplish this, set the disabled property to «yes».
HTML Code:
<textarea cols="20" rows="5" wrap="hard" >
As you can see many times word wrapping is often the desired look for your text areas. Since it makes everything nice and easy to read.</textarea>
Disabled Textareas:
As you can see many times word wrapping is often the desired look for your text areas. Since it makes everything nice and easy to read.
Keep in mind that just because users are unable to copy from the screen directly doesn’t prevent them from taking a screen capture or extracting the data from the source code. Disabling the textarea offers no security whatsoever.
- Continue
Трюки с textarea
В статье представлено несколько трюков, которые вы, возможно, не знали и которые вы найдёте полезными в своих разработках.
1. Изображение в качестве фона, которое пропадает при вводе текста.
Вы можете добавить фоновое изображение также, как и в любой другой элемент. В этом случае стиль по умолчанию для textarea изменяется, а именно бордер толщиной в 1px изменяется на скошенную границу. Исправляется это явным указанием бордера.
Фоновое изображение может повлиять на читаемость текста. Поэтому фоновое изображение надо убирать при получении фокуса и возвращать его, если textarea осталась без текста. Например, используя jQuery это можно сделать таким образом:
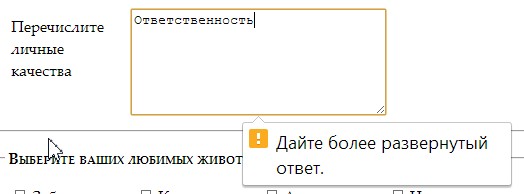
2. Placeholder в HTML5
В HTML5 появился новый атрибут, называемый placeholder. Значение этого атрибута показывается в текстовом элементе и исчезает при получении фокуса, а также в случае когда в элементе введён текст.
HTML5 placeholder поддерживается в следующих браузерах: Safari 5, Mobile Safari, Chrome 6, и Firefox 4 alpha.
3. Placeholder, HTML5 с поддержкой старых браузеров используя jQuery
Самый простой способ проверить поддерживается ли атрибут браузером это проверить с помощью javaScript:
Затем можно написать код, который будет срабатывать если браузер не поддерживает атрибут placeholder.
4. Удаляем обводку textarea
Браузеры на движках webkit, а также в FireFox 3.6, обводят textarea, когда он находится в фокусе. Удалить эту обводку можно используя css-свойство outline для webkit-браузеров. Для FireFox используется свойство -moz-appearance, либо можно просто установить элементу бордер или фон.
5. Запрет изменения размера
Webkit-браузеры добавляют к textarea визуальный элемент в правом нижнем углу, который позволяет изменять размер текстовой области. Если вы хотите убрать эту возможность, то вам необходимо использовать следующее css-свойство:
6. Добавление возможности изменения размера
jQuery UI позволяет добавить возможность изменения размера для textarea. Это работает для всех браузеров, а для webkit-браузеров подменяет стандартное поведение. Для того, чтобы использовать эту возможность, необходимо подключить jquery.ui и написать следующий код:
7. Изменение размера под содержимое
James Padolsey написал удобный jQuery-скрипт который позволяет автоматически изменять размер textarea под его содержимое. Похоже что этого плагина больше нет, но можно использовать например вот этот. Плагин содержит много настроек, но самый простой способ его использовать это:
8. Nowrap
Чтобы не переносить слова на новые строки, для всех элементов используется css-свойство white-space, которое не работает с textarea. Для textarea необходимо использовать атрибут wrap.
9. Удаляем скролл-бары в IE
IE показывает вертикальный скролл-бар для всех textarea. Вы можете их спрятать используя overflow: hidden, но в таком случае он не будет показываться при увеличении контента. Поэтому правильнее использовать следующий подход:
В этом случае скролл-бар не будет отображаться когда в textarea помещается весь текст, но выведется в случае необходимости.
Примеры к статье вы можете посмотреть здесь.
Получение значения из поля textarea -> javascript
Для получения из формы textarea значения в javascript, ничего кроме самой формы textarea нам не нужно! И вообще! В javascript нам потребуется лишь уникальная метка, с помощью которой мы сможем обратиться к тегу, как мне кажется самый простой это работать с id, поэтому во внутрь помещаем како-то уникальный id :
<textarea id=»id_textarea»></textarea>
Данные которые попадают в поле textarea, находятся в value
Далее данные из textarea получают таким образом:
var название_переменной = id_textarea.value;
Но поскольку, вы так, ничего не увидите и не поймете, а вообще- попадает, что-то из textarea, нам потребуется написать пару строк, которые вам покажут в процессе набора, что у нас попадает в textarea
Далее, чтобы вы смогли увидеть значение value из textarea, создадим отдельный блок, в который и будет отправлять это значение!
<div id=»therezult»></div>
Далее нам потребуется скриптик javascript , который и выведет значение value на экран:
<script> id_textarea.addEventListener(«keyup», event => { therezult.innerHTML = id_textarea.value; });</script>
Если вам интересно, то соберем весь код вместе:
<div id=»therezult»></div>
<textarea class=»width_99 height_100″ name=»id_textarea» id=»textarea»></textarea>
<script> id_textarea.addEventListener(«keyup», event => { therezult.innerHTML = id_textarea.value; });</script>
Результат — получение данных из textarea в реальном времени и выводе этого значения на экран! Чтобы увидеть данный процесс — начните вводить данные в textarea
Сюда, будем отправлять! post в javascriptphp ajax jQuery
Последняя дата редактирования : 09.03.2021 12:26
//dwweb.ru/comments_1_5/include/img/hand_no_foto.png
no
no
А теперь подробнее
Функция autoResize может принимать следующие параметры:
| onResize | Функция вызывается каждый раз в момент изменения размера textarea. Доступиться к textarea внутри функции можно как к ‘this’. | функция |
|---|---|---|
| animate | Анимация изменения высоты. Значение true — анимация есть, false — анимации нет. Значение по-умолчанию: true. | boolean |
| animateDuration | Время, которое занимает анимация в миллисекундах. Значение по-умолчанию: 150. | число |
| animateCallback | Функция вызывается каждый раз, как только заканчивается анимация. | функция |
| extraSpace | Количество пикселей которые будут добавлены к высоте textarea — дополнительный внутренний отступ снизу. Значение по-умолчанию: 20. | число |
| limit | По достижению этой высоты в пикселях текстовое поле перестает расширятся. Значение по-умолчанию: 1000. | число |
Примеры:
Отключаем дополнительный отступ снизу (по умолчанию он составляет 20px):
jQuery('textarea').autoResize({
     extraSpace : 0
});
Кстати, этот отступ (extraSpace) дает забавный эффект. Поскольку добавляется он к textarea не изначально, а только при первом вводе, то и текстовое поле при первом вводе внезапно расширяется (на величину extraSpace). Такой скачек может показаться нелогичным — ведь поле изначально может быть высоким и места в нем еще много, а оно все равно расширилось! Чтобы такого не происходило, можно инициализировать ресайз с параметром extraSpace : 0 (как в примере выше).
Демонстрация анимации при ресайзе:
	jQuery('textarea').autoResize({
	 	// On resize:
		onResize : function() {
			jQuery(this).css({color:'#fff', backgroundColor:'#999'});
		},
		// After resize:
		animateCallback : function() {
			jQuery(this).css({color:'#000', backgroundColor:'#fff'});
		}
	});
Заметка
Функция animateCallback будет вызываться, только если для textarea в CSS задать display:block (притом, исходя из текста плагина, сделано это специально). Учти, что этот самый display:block (если мы ему не помешаем) вызовет появление в Opera полос прокрутки. Для того, чтобы такого сюрприза не случилось используем overflow:hidden.
textarea{
	width:400px;
	height:70px;
	overflow:hidden;
	display:block;
}
Проверено в:
- IE 6-8
- Firefox 3.5
- Opera 9.5-10
- Safari 3
:focus State Styles#
Ok, we’ve completed the initial styles for our inputs and the textarea, but we need to handle for a very important state: .
We’re going to go for a combo effect that changes the border color to a value that meets 3:1 contrast against the unfocused state, but also adds a for a bit of extra highlighting.
And here’s why we defined our theme color of the focus state in hsl: it means we can create a variant of the border color by updating just the lightness value.
First, we define the border color by constructing the full hsl value from the individual CSS variable values:
Then, we add in the which will only use blur to create essentially a double-border effect. is acceptable to use inside , so we use it to lighten the original value by 40%, and also allow just a bit of alpha transparency:
Note that we’ve now added a new context for our contrast, which is the border vs. the , so ensure the computed difference for your chosen colors is at least 3:1 if using this method.
Optionally, jump back up to the rule and add a to animate the :
Finally, we don’t want to forget Windows High Contrast mode which will not see the or be able to detect the border color change. So, we include a transparent outline for those users:
Here’s a gif demo of focusing into the text input:
And here’s the appearance for the field, since it has a different :
In the CodePen HTML, there is a comment with an example of using an inline style to define an updated visual such as for an error state. Again, keep in mind that we are lightening the provided value by 40%, and the focused border color must be at least 3:1 contrast against the unfocused color, so consider that when you alter the CSS variable values.