50 возможностей slack для повышения продуктивности
Содержание:
- Slack продался
- Handling interactions in modals
- Sending messages with blocks
- Организуйте левую панель и настройте уведомления
- Frequently asked questions
- Сочетания клавиш для быстрой работы в Slack
- Тарифы Slack
- Как пользоваться Slack
- Making it fancy with advanced formatting
- Sending messages
- Publishing messages after modal submissions
- Вешайте в статусе эмодзи, отражающие текущие задачи
- Cемь лет истории
- Understanding modal flows
- Функции Slack
- Reach each other with @mentions
- Connecting with rtm.connect vs. rtm.start
- Generating Incoming Webhook URLs programmatically
- Frequently asked questions
- Установка Slack на различные устройства
- Basics
- Best Practices
- Responding to modal interactions
Slack продался
Компания Salesforce объявила о покупке корпоративного мессенджера Slack, прямого конкурента Microsoft Teams. Сделка будет завершена во II квартале финансового 2022 года, а ее сумма составила $27,7 млрд. Для сравнения, в феврале 2014 г. компания Facebook отдала за WhatsApp $19 млрд.
Salesforce – это американский разработчик программного обеспечения. Покупка Slack стала крупнейшим за всю его историю – до этого компания выкупила разработчика платформы для визуализации и аналитики данных Tableau, заплатив за него $15,7 млрд, а компания MuleSoft, занимающаяся разработкой интеграционного ПО, обошлась ей в $6,5 млрд.
Сама Salesforce существует с 1999 г. Ее основной продукт – это одноименная CRM-система, которую она предоставляет клиентам по модели SaaS (Software as s Service). В списке компаний, купленных Salesforce, могла оказаться и Twitter – стороны рассматривали возможность сделки в 2016 г., но акционеры соцсети выступили против.
Handling interactions in modals
Depending on how , there are a few different interactions that could happen.
Handling payloads
When someone uses an interactive component in your app’s modal views, the app will receive a payload.
This does not apply to components included in an (see ).
Once processed, the information in the payload can be used to respond to the interaction, .
Handling payloads
When a modal view is submitted, you’ll receive a .
This payload will contain a object with the values and contents of any stateful blocks that were in the submitted view. Consult the to understand the structure of this object.
As with payloads, the information in payloads can be used to respond, as .
Handling payloads
Your app can optionally receive whenever a user clicks on the Cancel or x buttons. These buttons are standard in all app modals.
To receive the payload when this happens, set to when creating a view with , pushing a new view with , or in s, as .
If a user closes a specific view in a modal using the Cancel button, you will receive a event with the corresponding view’s . However, if the user exits the modal with the x button in the top-right corner, you’ll receive a event with the initial modal view’s and the flag set to .
Sending messages with blocks
There are multiple ways for apps to send messages, and you can use Block Kit with most of them. Here’s a list of the methods you can use to publish messages with blocks:
- Incoming webhooks.
- and methods in the Web API.
- In response to slash commands.
- In response to message actions.
- You can also use blocks when creating Slack app based .
There are no special OAuth scopes needed to publish blocks, beyond those already specified within the methods above.
Read our guide to sending messages to get started with that process for your app. Once you’ve decided which sending method to use, consult that method’s reference guide to find out where to include your JSON payload.
When you call your selected method, your stack of blocks will transform into a beautiful new message, like this:
Организуйте левую панель и настройте уведомления
Практика показывает, что каждая мелочь имеет значение, и правильная настройка уведомлений может улучшить продуктивность рабочего процесса. Например, вы можете выключить уведомления из оффтоп-чатов, но оставить в самых важных диалогах.
Например, я часто так поступаю, если мне нужно решить серьезную задачу, которая требует 100% вовлечения в процесс.
Итак. Настраиваем.
Выбираем File — Preferences (настройки также можно вызвать сочетанием клавиш Ctrl + ,)
Как вариант, можем поставить уведомления только при упоминании вашего имени или определенных слов («копирайтер», «дизайнер», да хоть «табурет» или «тушканчик»).
Прокрутите экран ниже и укажите конкретные слова.
Также вы можете настроить режим «не беспокоить». По умолчанию он стоит с десяти вечера до восьми утра.
Теперь давайте оптимизируем наши чаты.
В том же окне, где мы работали с оповещениями, переходим на нижнюю вкладку. Проматываем до списка каналов (Channel List).
Нажав на стрелочку сбоку, вы можете скрыть каналы, в которых нет непрочитанных сообщений. Чтобы некоторые каналы не пропадали, их можно пометить звездочкой.
Кстати, не забывайте покидать старые каналы, в которых уже не ведется переписка. Зачем засорять левую панель?
Frequently asked questions
What can Slack apps do?
Apps connect tools and services with Slack, so you can use them without leaving your workspace. Apps make it easy to quickly find, share and act on information across your tech stack by creating one central place to stay focused and get work done. You can learn more in “5 ways to use apps and workflows in Slack.”Choose from over 2,400 apps in the Slack App Directory to support whatever work you do. If you use custom tools or follow processes specific to your company, you can also explore the Workflow Builder to create your own workflows, or build a custom app using the Slack API.
How do I install apps in Slack?
To install an app, first find it in the Slack App Directory. From an app’s page, click the Add to Slack button. Then follow the prompts to install the app or connect your account. You’ll see the option to connect your account after clicking Add to Slack if an app has already been installed in your workspace. You can also find and install apps from your workspace. Click Apps in your left sidebar and explore the directory from there.For more information on managing apps smartly and securely, check out “An admin’s guide to app management.”
Are Slack apps free?
You can add up to 10 apps to workspaces on the free version of Slack. If you’re on one of Slack’s paid plans, you can install as many apps as you’d like—there’s no limit! Keep in mind that some app services require payment or a subscription to use their product before you use it in Slack.To explore Slack’s free and paid plans, check out our pricing page.
How do I build a Slack app?Use the Slack API to build an app that connects the tools and data sources your organization needs to run smoothly. For all the resources you’ll need to get started and build your app, visit Slack API. And if you’re interested in learning from other developers, designers and product managers building on our platform, consider joining a Slack Platform Community group.
How do I create a workflow in Slack?Easily automate routine actions and communication by using Workflow Builder to create your own custom workflows.To access Workflow Builder, head to the main menu in Slack (by clicking on your workspace name at the top left) and navigate to Tools > Workflow Builder. From there you can create a custom workflow or choose from available pre-built templates. For help creating your own workflow, check out our step-by-step guide.Note: Workflow Builder is only available on Slack’s paid plans.
How do I become a Slack technology partner?Slack partners contribute a broad range of tools, services and solutions that help companies deploy Slack across organizations, ensuring that teams get the most out of Slack. Contact us to become a technology partner, or visit our Partners page to learn more.
Сочетания клавиш для быстрой работы в Slack
Самые полезные сочетания желательно запомнить, а для начала распечатать расположенный ниже текст и держать на рабочем столе перед глазами.
ALT + клик по сообщению — если среди обилия накопившихся сообщений есть особо важные, которым следует уделить внимание позже, их можно пометить непрочитанными;
CMD/CTRL + K/T — переключение между двумя последними просмотренными переписками. Если диалог ведется одновременно в двух окнах, можно быстро переключаться с одного на другое, по мере поступления новых сообщений;
/REMIND — напоминания
К примеру, можно дать команду напомнить связаться с кем-то через 30 минут. Причем напоминание можно настроить как для себя, так и для другого участника канала, достаточно после /REMIND ввести собаку, имя пользователя и команду;
/COLLAPSE — убрать превью сайтов. Обилие графической информации в чате (изображений, видео, различных ссылок) тормозит работу приложения. При работе с мобильного это часто становится проблемой;
/SHRUG. Удивленный смайлик. Очень важная функция;
/KICK. Позволяет прекратить общение с нежелательным участником;
/shrug — ¯\_(ツ)_/¯ — а так можно просто пожать плечами в ответ, когда продолжать дискуссию не имеет смысла;
CMD/CTRL + / — так можно вызвать подсказку по горячим клавишам. Если короткое пояснение не дает понимания, как пользоваться сочетанием, можно воспользоваться услугами виртуального помощника — Slackbot.
Кстати, сочетания клавиш избавят от необходимости постоянного использования англоязычного меню, если это доставляет дискомфорт.
Тарифы Slack
- Базовая, распространяется бесплатно. Число контактов пользователя не ограничено. Есть ограничения по подключению сторонних сервисов и работе с архивом сообщений, доступны манипуляции только по последним 10тыс.
- Standard. Ежемесячная плата за пользование составляет $6,67. Свободная работа с архивом сообщений. Возможность интеграции с Google Drive и Office 365, возможность работы в группах по 15 человек в аудио и видеоформате.
- Plus. Месячный абонемент составляет $12,5. К возможностям версии «Стандарт» добавляется идентификация на основе SAML, свободный экспорт всей переписки и интеграция с сотней сторонних сервисов в онлайн режиме.
Платформы, на которые можно установить мессенджер Slack: Windows, macOS, GNU/Linux, iOS, Android, Windows Phone и др. Кроме того, работать с Slack можно через браузер, в веб-версии.
Как пользоваться Slack
Теперь, когда вы знаете о достоинствах и недостатках Slack, настало время обсудить, как им пользоваться. Вы помните, что интерфейс приложения англоязычный, но тем не менее в нём несложно разобраться.
Создание учетной записи
- Чтобы создать аккаунт в Slack, откройте приложение и нажмите кнопку внизу с надписью «Create a new workspace» — если вы сами ответственны за организацию рабочего чата и вам нужно создать его, либо синюю ссылку «Find your Slack workspace», если вы хотите присоединиться к уже существующему сообществу.
- Впишите e-mail в нужное поле.
- Проверьте почту и скопируйте код из письма.
- Вернитесь к окну Slack и нажмите Ctrl+V.
- Укажите своё имя и никнейм.
- Придумайте надёжный пароль.
- Если вы администратор, то также заполните информацию о вашей компании, укажите количество людей, которых вы добавите, вашу должность и роль в чате.
- Разошлите ссылку для приглашения своим коллегам.
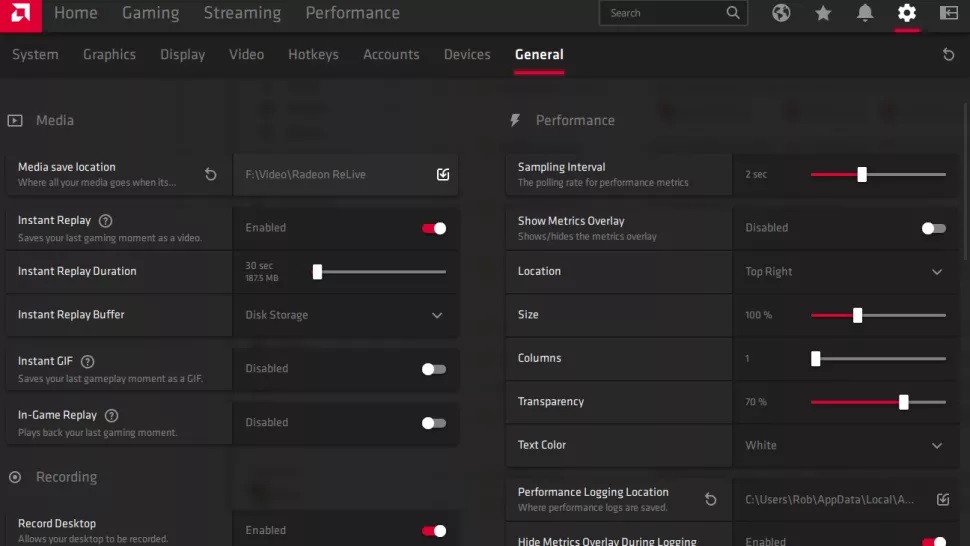
Внешний вид мессенджера
После входа в аккаунт на цветной плашке слева вы увидите рубрикатор групп и чатов, уведомления, а справа – окно с лентой, строкой поиска, инструментом отметки важных сообщений и настройками. Если вы работаете с Linux, лучше сразу отключить аппаратное ускорение, чтобы не испытывать проблем с отображением эмодзи и анимированного контента. Для этого нажмите стрелочку, располагающуюся рядом с названием сообщества, выберите Prefertences — Linux App — Disable hardware acceleration и поставьте напротив последнего галочку.
Настраиваем свой профиль
Переходим к настройке аккаунта:
- Снова нажмите на имя пользователя, выберите раздел под названием «Profile&account» — «Edit profile».
- Добавьте свою фотографию, некоторые сведения о себе.
- Справа есть также значок зубчатого колесика, кликнув по которому, вы сможете выбрать способ входа в аккаунт, сменить пароль, выставить плашку со своим часовым поясом, настроить взаимосвязь с другими мессенджерами, если вам удобнее писать в Slack через них, и т. п.
Настройка каналов
Структура мессенджера складывается из обширных веток общения – каналов и небольших локальных групп внутри них. Если вы регистрируетесь в «Slack» по приглашению, то вам ничего не нужно настраивать – вы попадаете в готовую среду. А если вы организуете общение коллег, то придётся кое-что сделать:
- Новый канал создаётся кликом по символу «+» рядом со словом «Channels» в рубрикаторе слева.
- Назовите канал, напишите аннотацию, какова его тематика, пригласите коллег.
- Чтобы допускать к информации только определённых лиц, можно указать их в настройках приватности.
Готовый канал можно изменить, открыв его и нажав на иконку в виде зубчатого колесика справа вверху.
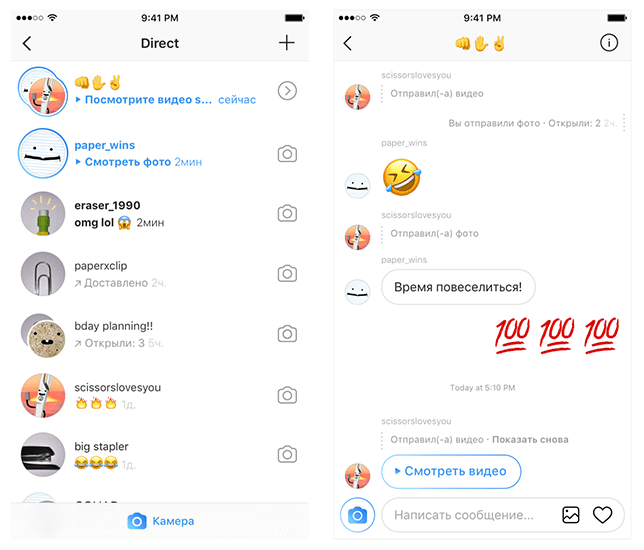
Отправка сообщений Slack
Чтобы отправить сообщение, в рубрикаторе слева выберите участника беседы (их список находится под заголовком Direct Messages) или канал (Channels) – справа появится форма для набора текста. В первом случае сообщение смогут прочитать все пользователи указанного канала, а во втором – только один человек. В публичных каналах технически возможно удалять уже отправленные сообщения (через соответствующую кнопку), но некоторые сообщества запрещают это, потому что теряется смысл обсуждения. Чтобы упомянуть пользователя в общей беседе, достаточно перед ником поставить символ «@» — ему придёт уведомление.
Приглашение друзей
Для приглашения на свой канал можно использовать ссылку, которую вы получили при регистрации профиля, либо найти слева рубрику Invite People. Человеку также придётся создать аккаунт в этой сети, чтобы иметь доступ к публикациям.
Встроенные приложения
Как уже упоминалось, Slack интегрируется с другими ресурсами: почтовыми, редакторами документов, мессенджерами, хранилищами и т. п. Если вам нужна такая функция, откройте раздел Apps и выберите необходимое расширение – под каждым из них есть кнопка для установки.
Making it fancy with advanced formatting
Incoming Webhooks conform to the same rules and functionality as any of our other messaging APIs. You can make your posted messages as simple as a single line of text, or make them really useful with interactive components.
The process of using all these extras and features is basically the same as . The only difference is the JSON payload that you send to your webhook URL will contain other fields in addition to . Here’s a more advanced HTTP request example that you can use with the same webhook that you :
This example uses Block Kit visual components to make the message more expressive and useful.
We have some fantastic docs that explain how to use text formatting and Block Kit to make your messages more interesting and interactive, so please dive into our overview of message composition.
You cannot override the default channel (chosen by the user who installed your app), username, or icon when you’re using Incoming Webhooks to post messages. Instead, these values will always inherit from the associated Slack app configuration.
Sending messages
You can send a message to Slack by sending JSON over the WebSocket connection.
Every event should have a unique (for that connection) positive integer
ID. All replies to that message will include this ID allowing the client to
correlate responses with the messages sent; replies may be «out of order»
due to the asynchronous nature of the message servers.
Also, as with events sent from the server, each event sent by the client has a
string specifying what the message does — chat messages are of type .
Channel selection
So to post the text «Hello world» to a channel, you can send this JSON:
You can send a message to a private group or direct message channel in the
same way, but using a group ID () or direct message channel ID ().
To send a message both as and to the authenticating user, use the correct direct message channel ID for that user. The direct message ID can be found as part of the response to , or by consulting .
Formatting messages
The RTM API only supports posting simple messages formatted using our
default message formatting mode. It does not support
attachments or other message formatting modes. To post a
more complex message as a user clients can call the
chat.postMessage Web API method with
set to true.
User mentions over RTM should use the User ID-based syntax:
Handling responses
Once the JSON has been sent to the server visual clients should immediately
display the text in the channel, grayed out or otherwise marked to indicate
that it is «pending». At some point after that, usually a few milliseconds
later, the server will send a confirmation that the message was received:
Replies to messages sent by clients will always contain two properties: a
boolean indicating whether they succeeded and an integer
indicating which message they are in response to.
In the case of a reply to a chat message, if successful, the reply will
contain the canonical recorded timestamp of the message. All messages within
a single channel are guaranteed to have a unique timestamp which is ASCII
sortable. Given the precision of the timestamp, clients should treat these
timestamps as strings, not floats/doubles. Once a successful reply has been
returned, the message in the chat log should no longer be grayed out — it has
now been delivered.
Chat message replies also contain the message text, which may vary from the
sent message due to URL detection.
Publishing messages after modal submissions
You may want to publish a message to a Slack channel after your modal is submitted. You have three options for doing so:
- Request necessary permissions and use the ,
- Generate and use a webhook,
- Include specific blocks and a special parameter in your modal.
Unless your app is already setup to do either of the first two things, three is the magic number. This method provides the simplest route to message publishing for certain apps that use modals, such as those also using shortcuts.
Here’s how you do it:
- with a array that contains either a or element.
- Set the parameter in the select menu to .
- Open and handle your modal as described in the guide above.
Here’s an example view object containing this special configuration:
When a user opens the modal, they’ll be able to choose a conversation into which they’d like a message to be posted.
If you supply the for the element, you can even pre-populate the conversation they’re currently viewing.
Once they submit the view, you’ll receive a that will now include . You can use the values in to publish message responses, .
We recommend keeping these best practices in mind while using this technique:
- Ensure that you provide clear instruction to the user that a message will be posted to the conversation they choose.
- Consider setting to to allow the user to decline selecting a conversation.
- If the user declines to select a conversation, or if they cancel the modal, handle this correctly.
Вешайте в статусе эмодзи, отражающие текущие задачи
На первый взгляд Slack напоминает обычный мессенджер, но ожидать мгновенных ответов здесь не стоит — если человек находится на совещании или занят срочной работой, постоянные уведомления будут только отвлекать.
Чтобы коллеги понимали, когда вас лучше не беспокоить, используйте статусы. Для этого нажмите на поле Update Your Status в верхнем левом углу экрана. В программе есть несколько статусов по умолчанию — например, «На больничном» или «На совещании», но вы можете придумать и собственные обозначения. «Мы договорились, что эмодзи с едой — это обеденный перерыв, а значок камеры — съемки, — рассказывает Кей-Кей Клэпп, директор по контенту сайта iFixit. — Если вы используете плагин Google Календаря, Slack может автоматически вешать в статусе эмодзи, обозначающее совещание».
Cемь лет истории
Slack был запущен Стюартом Баттерфилдом в августе 2013 г., а само его название – это сокращение от «Searchable Log of All Conversation and Knowledge», что переводится как «Журнал бесед и данных с функцией поиска». Slack обладает всеми возможностями современных мессенджеров, в том числе позволяет участникам команды общаться в каналах, приватных группах и непосредственно друг с другом, а также проводить поиск по содержимому бесед.
Slack умеет интегрироваться с сервисами Google Drive, Trello, Dropbox, Box, Heroku, IBM Bluemix, Crashlytics, GitHub, Runscope и Zendesk. В марте 2016 г. в мессенджер были добавлены функции голосовых и видеозвонков.
Как пандемия изменила подходы к организации рабочего пространства
Интеграция
По итогам II квартала финансового 2021 года, завершившегося для Slack 31 июля 2020 г., выручка компании выросла на 49% год к году и достигла $215,9 млн при одновременном сокращении убытков с $359,6 млн за аналогичный период прошлого финансового года до $73 млн. Компания также сообщила о 30-процентном росте количества платных клиентов год к году – из стало 130 тыс.
Understanding modal flows
In our overview of modals, we the concept and flow of the modal .
Here is that flow again, this time in a more technical form:
-
A user interacts with an app entry point. This sends an to the app.
-
With the from the payload, (view A), the app uses .
-
The user interacts with an interactive component in view A. This sends another to the app.
-
The app uses the context from this new payload to with some additional content.
-
The user interacts with another interactive component in view A. Another interaction payload is sent to the app.
-
This time the app uses the context from the new payload to , causing it to appear to the user immediately. View A remains in the view stack, but is no longer visible or active.
-
The user enters some values into in view B, and clicks the view’s submit button. This sends a to the app.
-
The app and by .
In the following guide we’ll break down all the steps within this flow, including alternative choices the app could have made in various steps.
Функции Slack
Коммуникация
Обновления статуса
Обновления статуса постинга брифа или микроблога
Система обмена мгновенными сообщениями
Обмен сообщениями между двумя пользователями или внутри групп
Активити фид
Возможность фильтровать и кастомизировать лайв активити фид в сети
Уведомления
Получайте уведомления о контенте или группах внутри приложения или через электронные сообщения в режиме реального времени
Комментарии и голосование
Выкладывайте посты о блогах, микроблогах, документах и посты иного характера. Голосуйте за посты или за контент, которыми поделились с вами другие пользователи.
Дискуссии
Поделитесь идеями, спрашивайте совета и собирайте фидбек от ваших коллег
Директория пользователя
Осуществляйте поиск или просматривайте через директорию пользователей в сети
Онлайн статус коллег
Просматривайте онлайн статус коллег в сети
Управление контентом
Шаринг файлов
Аплоад и шаринг файлов таких как документы, изображения и видео
Совместная работа над документами
Создавайте и редактируйте документы с другими пользователями в режиме реального времени
Контроль версий
Просматривайте последнюю версию документа, отслеживайте изменения, или при необходимости возвращайтесь к более ранней версии документа
Тегирование
Тегируйте контент, чтобы организовать и определить особые департаменты или категории
База знаний
Возможность создания базы знаний и статей о том, как сделать что-то
Опросы
Создавайте опросы или голосования для сбора мнений о проблеме или идее
Инструменты повышения производительности
Управление задачами
Создавайте задачи и осуществляйте их организацию по статусу, приоритету или департаменту
Календарь
Добавляйте события в ваш календарь, делитесь событиями с другими пользователями и просматривайте календарь команды или компании
Поиск
Осуществляйте поиск специфичного контента, таких как пользователи, документы, теги или медиа
Мобильность
Создана возможность беспрепятственного использования программы на множестве мобильных девайсов, включая телефоны и планшеты
Поддержка
Многоязыковая поддержка
Предоставляет возможность пользователям просматривать и вносить контент на разных языках.
Администрирование
Модерация
Администраторы могут модерировать контент с целью сохранения приемлемой для рабочего места среды
Пользователь, роль и управление доступом
Предоставление доступа для выбора данных, объектов и т.д. с учетом пользователей, роли пользователя, групп и т.д.
Производительность и надежность
Программа постоянно и непрерывно доступна (аптайм) и позволяет пользователям выполнить задачи быстро в силу того, что они не ждут ответа программы на предпринятые пользователям действия
Reach each other with @mentions
Why it matters
Work often involves waiting for reviews or approvals before you can move forward. When matters are time-sensitive or you want to address a specific person in Slack, you can grab their attention in any channel by mentioning their username preceded by an @ symbol. They will then get a notification.
How it works
After meetings on any project, head into the project’s dedicated channel in Slack and post an update for the team. Be sure to format key information into a bulleted list, such as:
- Decisions that were made
- Next steps with due dates. For each next step, be sure to @mention the teammate(s) who agreed to take them on so they receive the message and can confirm they’re accountable
- Any outstanding questions you’d like to discuss in the channel with the larger team
Connecting with rtm.connect vs. rtm.start
There are currently two ways to reserve websocket connections.
concerns itself only with getting your app connected to the RTM API, and only includes limited information about the connecting user and housing workspace.
includes not only an entire kitchen sink but an entire kitchen filled with information about the user, its workspace, its channels, its current state in the universe. is naturally more difficult to use with Enterprise Grid and other large workspaces.
We strongly recommend using to reserve your websocket connections and use the Web API in tandem to collect all the state information your app needs.
Generating Incoming Webhook URLs programmatically
In the guide above we showed you how to quickly generate a webhook URL through your app settings UI, but when you’re distributing your app (for use by non-collaborators), you’ll need a way for it to generate those URLs on the fly.
Fortunately, Incoming Webhooks can be easily generated during the .
If you are going to , it’s likely you’re already planning to use the OAuth process anyway. Below we’ll cover the adjustments you’ll need to make to that process to enable Incoming Webhooks.
1. Change your scopes
As part of the install process, your app defines a set of initial permission scopes to request from a user. Whether you’re using the to provide a link for users to install your app or your own , there will be a parameter that sets this initial list of permissions.
To generate Incoming Webhook URLs, make sure you include the permission in that list. When you do, users will see an additional permission on the Authorize screen that lets them pick the channel where Incoming Webhooks will post to, .
2. Grab Incoming Webhook URL from the OAuth Response
Once a user installs your app, and your app has completed the , you’ll receive a JSON response like this:
You can see that this OAuth response contains an object, and right there in the field is your brand new Incoming Webhook URL. You can now go ahead and use this URL to post a message, as . Here’s a full explanation of all the fields in this object:
| Attribute | Type | Description |
|---|---|---|
| String | The name of the channel that the user selected as a destination for webhook messages | |
| String | The ID of the same channel | |
| String | A link to the page that configures your app within the workspace it was installed to | |
| String | The Incoming Webhook URL |
Frequently asked questions
What can Slack apps do?
Apps connect tools and services with Slack so that you can use them without leaving your workspace. Apps make it easy to quickly find, share and act on information across your tech stack by creating one central place to stay focused and get work done. You can learn more in ‘Five ways to use apps and workflows in Slack’.Choose from over 2,400 apps in the Slack App Directory to support whatever work you do. If you use custom tools or follow processes specific to your company, you can also explore the Workflow Builder to create your own workflows or build a custom app using the Slack API.
How do I install apps in Slack?
To install an app, first find it in the Slack App Directory. From an app’s page, click on the Add to Slack button. Then follow the prompts to install the app or connect your account. You’ll see the option to connect your account after clicking on Add to Slack if an app has already been installed in your workspace. You can also find and install apps from your workspace. Click on Apps in your left sidebar and explore the directory from there.For more information on managing apps smartly and securely, take a look at ‘An admin’s guide to app management’.
Are Slack apps free?
You can add up to ten apps to workspaces on the free version of Slack. If you’re on one of Slack’s paid subscriptions, you can install as many apps as you like – there’s no limit! Bear in mind that some app services require payment or for you to have a subscription to use their product before you can use it in Slack.To explore Slack’s free and paid subscriptions, take a look at our pricing page.
How do I build a Slack app?Use the Slack API to build an app that connects the tools and data sources that your organisation needs to run smoothly. For all the resources that you’ll need to get started and build your app, visit Slack API. And if you’re interested in learning from other developers, designers and product managers building on our platform, consider joining a Slack platform community group.
How do I create a workflow in Slack?Easily automate routine actions and communication by using Workflow Builder to create your own customised workflows.To access workflow builder, head to the main menu in Slack (by clicking on your workspace name at the top left) and navigate to Tools > Workflow Builder. From there, you can create a customised workflow or choose from available pre-built templates. For help with creating your own workflow, take a look at our step-by-step guide.Note: Workflow Builder is only available on Slack’s paid subscriptions.
How do I become a Slack technology partner?Slack partners contribute a broad range of tools, services and solutions that help companies to deploy Slack across organisations, ensuring that teams get the most out of Slack. Contact us to become a technology partner, or visit our Partners page to learn more.
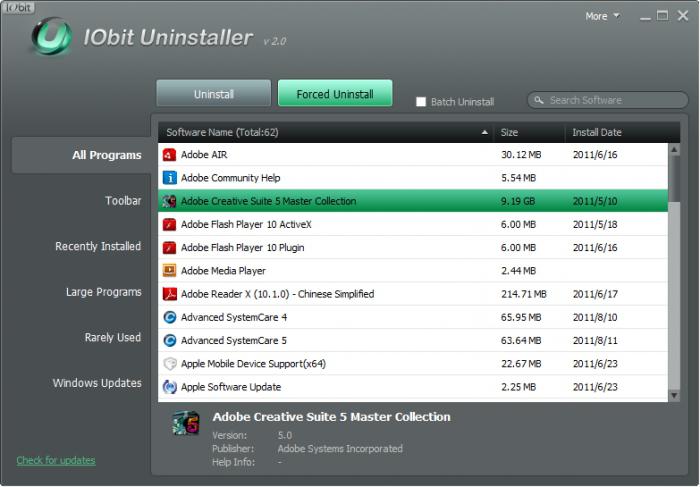
Установка Slack на различные устройства
После скачивания установщика для ОС Windows, достаточно запустить EXE-файл и проследовать подсказкам мастера настройки. Пользователи ОС Linux могут установить DEB-пакет несколькими путями:
- при помощи встроенного центра приложений (двойной клик на скачанном файле);
- используя менеджер пакетов gDebi (актуально для пользователей Linux Mint);
- используя терминал — введите здесь строку, которая будет содержать sudo dpkg-i и путь к файлу, например, ‘/home/ubuntu/Загрузки/slack-desktop.deb’.
На этом, инструкция Slack по установке завершается и можно начинать полноценно пользоваться программой.
Basics
The Web API is a collection of HTTP RPC-style methods, all with URLs in the form .
While it’s not a REST API, those familiar with REST should be at home with its foundations in HTTP.
Use HTTPS, SSL, and TLS v1.2 or above when calling all methods. .
Each method has a series of arguments informing the execution of your intentions.
Pass arguments as:
- GET querystring parameters
- POST parameters presented as
- or a mix of both GET and POST parameters
- allow arguments attributes.
- [] expects , which is a fancy way of asking you to send most parameters as key/value pairs but send files in their native content type.
Some methods, like and feature arguments that accept an associative JSON array. These methods can be difficult to properly construct when using a Content-type, and we strongly recommend using instead.
URL-encoded bodies
When sending URL-encoded data, set your HTTP header to and present your key/value pairs according to RFC-3986.
For example, a POST request to might look something like this:
JSON-encoded bodies
For , you may alternatively send your HTTP POST data as .
There are some ground rules:
- You must explicitly set the HTTP header to . We won’t interpret your POST body as such without it.
- You must transmit your as a bearer token in the HTTP header.
- You cannot send your token as part of the query string or as an attribute in your posted JSON.
- Do not mix arguments between query string, URL-encoded POST body, and JSON attributes. Choose one approach per request.
- Providing an explicitly value for an attribute will result in whichever default behavior is assigned to it.
For example, to send the same request above to with a JSON POST body:
Note how we present the token with the string pre-pended to it, indicating the OAuth 2.0 authentication scheme. Consult your favorite HTTP tool or library’s manual for further detail on setting HTTP headers.
Here’s a more complicated example: Posting a message with menus using .
Note how the argument is sent a straight-forward JSON array.
Here’s how to do that with cURL:
curl example
Errors specific to passing JSON
If the posted JSON is invalid, you’ll receive one of the following errors in response:
- — The JSON you’ve included in your POST body cannot be parsed. This might be because it’s actually not JSON, or perhaps you did not correctly set your HTTP header. Make sure your JSON attribute keys are strings wrapped with double-quote () characters.
- — We could understand that your code was JSON-like enough to parse it, but it’s not actually a JSON hash of attribute key/value pairs. Perhaps you sent us an array, or just a string or number.
In both cases, you’ll need to revise your JSON or how you’re transmitting your data to resolve the error condition.
Best Practices
- If you’re not ready to respond to an incoming command but still want to acknowledge the user’s action by having their slash command displayed within the channel, respond to your URL’s invocation with a simplified JSON response containing only the field set to : .
- If your command doesn’t need to post anything back (either privately or publicly), respond with an empty HTTP 200 response. You should use this only if the nature of your command makes it obvious that no response is necessary or desired. Even a simple «Got it!» ephemeral response is better than nothing.
- Help your users understand how to use your command. Provide a help action that explains your command’s usage. If your slash command was , you should provide a response to that lists the other actions available.
- Keep track of the validation token Slack gives you when the command is created. Always validate the field in an incoming slash command request has been issued to you by Slack.
- Turn on by flipping the toggle in your slash command’s configuration dialog. Always work with user IDs and channel IDs.
- to avoid conflicts with other apps.
- Using multiple commands with multiple apps or development environments? Look for to differentiate which app is intended for the slash command invocation.
Responding to modal interactions
After receiving either of the interaction payloads described above from a modal source, your app can choose from an .
In every case, apps must back to the HTTP request that sent the payload.
It’s likely you’ll also want your app to modify the modal itself in some way. If so, you have a couple of options, depending on the type of interaction that occurred.
If you want to modify a modal in response to a interaction, your app must . Then the app can use the API endpoints to make desired modifications.
If you want to modify a modal in response to a interaction, your app can include a valid with the . We’ll explain how to do that .