Модальное окно bootstrap: разработка формы входа, регистрации и восстановления пароля
Содержание:
- Methods
- Полная структура страницы
- JQuery часть
- The Default Modal
- CSS-часть
- Модальное окно
- События, связанные с модальным окном
- Загружайте контент в модальные окна через Ajax
- 5 последних уроков рубрики «Разное»
- Скрипт JavaScript для управления компонентом Modal
- Optional Sizes#
- How it works
- Usage
- Explanation of Code
- Activating Bootstrap Modals with jQuery
- .modal(‘handleUpdate’)
- How it works
- Параметры
Methods
Asynchronous methods and transitions:
All API methods are asynchronous and start a transition.
They return to the caller as soon as the transition is started but
before it ends. In addition, a method call on a
transitioning component will be ignored.
Passing options
Activates your content as a modal. Accepts an optional options
.
| Method | Description |
|---|---|
| Destroys an element’s modal. | |
|
Static method which allows you to get the modal instance associated with a DOM element |
|
|
Manually readjust the modal’s position if the height of a modal changes while it is open (i.e. in case a scrollbar appears). |
|
|
Manually hides a modal. Returns to the caller before the modal has actually been hidden (i.e. before the event occurs). |
|
|
Manually opens a modal. Returns to the caller before the modal has actually been shown (i.e. before the event occurs). |
|
|
Manually toggles a modal. Returns to the caller before the modal has actually been shown or hidden (i.e. before the or event occurs). |
Полная структура страницы
Это полная структура страницы, которая требуется для создания модальных окон. Создайте страницу Index.html и добавьте в нее приведенный ниже код.
<!DOCTYPE html>
<html>
<head>
<meta http-equiv="X-UA-Compatible" content="IE=edge">
<meta name="viewport" content="width=device-width, initial-scale=1">
<link rel="stylesheet" href="https://maxcdn.bootstrapcdn.com/bootstrap/3.3.7/css/bootstrap.min.css">
</head>
<body>


    <div class="modal fade" tabindex="-1" role="dialog">
      <div class="modal-dialog" role="document">
        <div class="modal-content">

        <div class="modal-header">
          <!-- Заголовок модального окна -->
        </div>

        <div class="modal-body">
          <!-- Тело модального окна -->
        </div>

        <div class="modal-footer">
          <!-- Футер модального окна -->
        </div>

        </div><!-- /.modal-content -->
      </div><!-- /.modal-dialog -->
    </div><!-- /.modal -->


    <!-- Здесь помещаются JS файлы. -->
    <script src="https://ajax.googleapis.com/ajax/libs/jquery/1.12.4/jquery.min.js"></script>
    <script src="https://maxcdn.bootstrapcdn.com/bootstrap/3.3.7/js/bootstrap.min.js"></script>

</body>
</html>
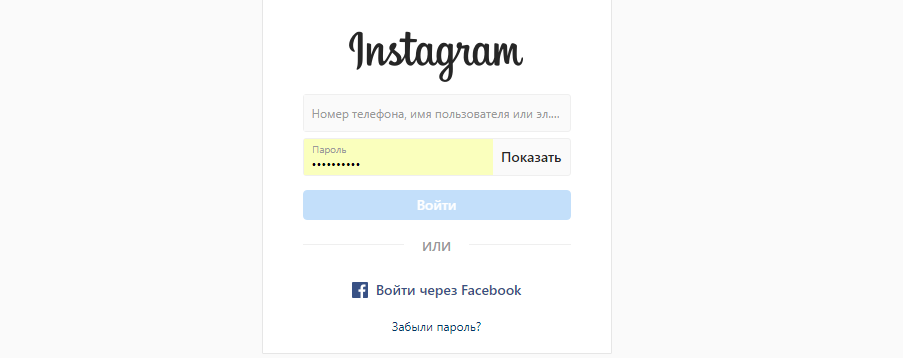
Теперь создадим модальные формы входа, регистрации и восстановления пароля. Единственное модальное окно, которое я использовал в примере, с тремя <div class=»modal-content»>. По умолчанию оно будет формой входа в систему. Такие же блоки мы создаем для других функций, все они будут иметь разные идентификаторы. Смотрите пример, приведенный ниже.
<div class="modal fade" tabindex="-1" role="dialog">
  <div class="modal-dialog" role="document">

    <div class="modal-content" id="login-modal-content">

      <div class="modal-header">
        <!-- Заголовок Login -->
      </div>
      <div class="modal-body">
        <!-- Тело Login -->
      </div>
      <div class="modal-footer">
        <!-- Футер Login -->
      </div>

    </div>

    <div class="modal-content" id="signup-modal-content">

      <div class="modal-header">
        <!-- Заголовок Signup -->
      </div>
      <div class="modal-body">
        <!-- Тело Signup -->
      </div>
      <div class="modal-footer">
        <!-- Футер Signup -->
      </div>

    </div>

    <div class="modal-content" id="forgot-password-modal-content">

      <div class="modal-header">
        <!-- Заголовок Forgot Password -->
      </div>
      <div class="modal-body">
        <!-- Тело Forgot Password -->
      </div>
      <div class="modal-footer">
        <!-- Футер Forgot Password -->
      </div>
Содержимое модального окна для авторизации будет использоваться по умолчанию. Остальные два блока скрыты и их можно будет отобразить при нажатии на конкретные ссылки, указанные во всех футерах.
JQuery часть
Рассмотрим код jQuery. В нем используются методы FadeOut и FadeIn, которые срабатывают при клике по ссылкам футера. После чего формы меняются местами.
<script>
$(document).ready(function(){

    $('#Login-Form').parsley();
    $('#Signin-Form').parsley();
    $('#Forgot-Password-Form').parsley();

    $('#signupModal').click(function(){
     $('#login-modal-content').fadeOut('fast', function(){
        $('#signup-modal-content').fadeIn('fast');
     });
    });

    $('#loginModal').click(function(){
     $('#signup-modal-content').fadeOut('fast', function(){
        $('#login-modal-content').fadeIn('fast');
     });
    });

    $('#FPModal').click(function(){
     $('#login-modal-content').fadeOut('fast', function(){
        $('#forgot-password-modal-content').fadeIn('fast');
        });
    });

    $('#loginModal1').click(function(){
     $('#forgot-password-modal-content').fadeOut('fast', function(){
        $('#login-modal-content').fadeIn('fast');
     });
    });

});
</script>
The Default Modal
The default Bootstrap Modal looks like this:
To trigger the modal, you’ll need to include a link or a button. The markup for the trigger element might look like this:
Notice the link element has two custom data attributes: and . The toggle tells Bootstrap what to do and the target tells Bootstrap which element is going to open. So whenever a link like that is clicked, a modal with an ID of “basicModal” will appear.
Now let’s see the code required to define the modal itself. Here’s the markup:
The parent of the modal should have the same ID as used in the trigger element above. In our case, it would be .
Note: Custom attributes like and in the parent modal element are used for accessibility. It’s good practice to make your website accessible to all, so you should include these attributes since they won’t negatively affect the standard functionality of the modal.
In the modal’s HTML, we can see a wrapper nested inside the parent modal . This has a class of that tells where to look for the contents of the modal. Inside this , we need to place the three sections I mentioned earlier: the header, body, and footer.
The modal header, as the name implies, is used to give the modal a title and some other elements like the “x” close button. This should have a attribute that tells Bootstrap to remove the element.
Then we have the modal body, a sibling of the modal header. Consider the body an open canvas to play with. You can add any kind of data inside the body, including a YouTube video embed, an image, or just about anything else.
Lastly, we have the modal footer. This area is by default right aligned. In this area you could place action buttons like “Save”, “Close”, “Accept”, etc., that are associated with the action the modal is displaying.
Now we’re done with our first modal! You can check it out on our demo page.
CSS-часть
Ниже приводится CSS-код для всех модальных форм и Parsley.
body {
  padding-top: 70px;
}
.modal-header, .modal-body, .modal-footer{
  padding: 25px;
}
.modal-footer{
  text-align: center;
}
#signup-modal-content, #forgot-password-modal-content{
  display: none;
}

/** Валидация */

input.parsley-error{
  border-color:#843534;
  box-shadow: none;
}
input.parsley-error:focus{
  border-color:#843534;
  box-shadow:inset 0 1px 1px rgba(0,0,0,.075),0 0 6px #ce8483
}
.parsley-errors-list.filled {
  opacity: 1;
  color: #a94442;
  display: none;
}
Скачать эту модальную форму
Данная публикация является переводом статьи «Designing Login, Sign Up & Forgot Password Modal Form with Bootstrap» , подготовленная редакцией проекта.
Модальное окно
Модальные окна обладают одной очень важной особенностью. Их нельзя блокировать браузерами, как всплывающие окна, поэтому они идеально подходят для концентрации внимания пользователей
Для того чтобы сделать обычный div блок модальным окном, ему нужно присвоить класс modal. Также мы можем контролировать наличия таких элементов, как заголовок и контент, путём добавления классов modal-body и modal-header.
<div id="modal" class="modal">
	<div class="modal-header">
		<h2>Lorem Ipsum</h2>
	</div>
	<div class="modal-body">
		<p>Lorem ipsum dolor sit amet, consectetur adipiscing elit. Donec placerat sem ipsum, ut faucibus nulla.
		Nullam mattis volutpat dolor, eu porta magna facilisis ut. In ultricies, purus sed pellentesque mollis, nibh
		tortor semper elit, eget rutrum purus nulla id quam.</p>
	</div>
</div>
Данный код — это просто html представление, которое вы можете увидеть ниже:
События, связанные с модальным окном
Событие сработатывает при вызове метода .
$('#modal-example').on('show.bs.modal', function() {
    // что-то делаем...
});
Событие сработатывает после завершения работы метода , то есть когда окно открыто, и все его CSS-стили загружены.
$('#modal-example').on('shown.bs.modal', function() {
    // что-то делаем...
});
Событие сработатывает при вызове метода .
$('#modal-example').on('hide.bs.modal', function() {
    // что-то делаем...
});
Событие сработатывает после завершения работы метода .
$('#modal-example').on('hidden.bs.modal', function() {
    // что-то делаем...
});
Если окно было открыто по событию клика, то элемент, открывший его, становится доступным через свойство события .
<button type="button" class="btn btn-primary" data-toggle="modal"
        data-target="#modal-example">
    Открыть модальное окно
</button>

<!-- Модальное окно -->
<div class="modal fade" id="modal-example" tabindex="-1"
     role="dialog" aria-hidden="true">
    ..........
</div>
$(document).ready(function() {
    // событие при открытии модального окна
    $('#modal-example').on('show.bs.modal', function (e) {
        if (e.relatedTarget == undefined) {
            alert('Окно сейчас будет открыто без клика по элементу');
        } else {
            alert('Окно сейчас будет открыто после клика на ' + e.relatedTarget.nodeName);
        }
    });
});
Поиск:
Bootstrap • CSS • HTML • JavaScript • Web-разработка • Верстка • Фреймворк • Модальное окно • Modal
Загружайте контент в модальные окна через Ajax
Вы также можете загрузить удаленный контент в модальном окне Bootstrap через Ajax.
В следующем примере содержимое внутри модального окна будет вставлено из удаленного файла после активации с использованием метода jQuery и события Bootstrap .
<!-- jQuery-код (для загрузки контента через Ajax) -->
<script>
$(document).ready(function(){
    $("#myModal").on("show.bs.modal", function(event){
        // Поместите возвращенный HTML в выбранный элемент
        $(this).find(".modal-body").load("remote.php");
    });
});
</script>

<!-- HTML-код кнопки (триггер модального окна) -->
<button type="button" class="btn btn-lg btn-primary" data-toggle="modal" data-target="#myModal">Показать модальное окно</button>

<!-- HTML-код модального окна -->
<div id="myModal" class="modal fade" tabindex="-1">
    <div class="modal-dialog">
        <div class="modal-content">
            <div class="modal-header">
                <h5 class="modal-title">Модальное окно с Ajax</h5>
                <button type="button" class="close" data-dismiss="modal">×</button>
            </div>
            <div class="modal-body">
                <!-- Контент загруженный из файла "remote.php" -->
            </div>
            <div class="modal-footer">
                <button type="button" class="btn btn-secondary" data-dismiss="modal">Закрыть</button>
                <button type="button" class="btn btn-primary">OK</button>
            </div>
        </div>
    </div>
</div>
Вы также можете размещать всплывающие подсказки внутри модальных окон при необходимости. Когда модальные окна закрыты, любые всплывающие подсказки автоматически отключаются.
5 последних уроков рубрики «Разное»
-
Выбрать хороший хостинг для своего сайта достаточно сложная задача. Особенно сейчас, когда на рынке услуг хостинга действует несколько сотен игроков с очень привлекательными предложениями. Хорошим вариантом является лидер рейтинга Хостинг Ниндзя — Макхост.
-
Как разместить свой сайт на хостинге? Правильно выбранный хороший хостинг — это будущее Ваших сайтов
Проект готов, Все проверено на локальном сервере OpenServer и можно переносить сайт на хостинг. Вот только какую компанию выбрать? Предлагаю рассмотреть хостинг fornex.com. Отличное место для твоего проекта с перспективами бурного роста.
-
Создание вебсайта — процесс трудоёмкий, требующий слаженного взаимодействия между заказчиком и исполнителем, а также между всеми членами коллектива, вовлечёнными в проект. И в этом очень хорошее подспорье окажет онлайн платформа Wrike.
-
Подборка из нескольких десятков ресурсов для создания мокапов и прототипов.
Скрипт JavaScript для управления компонентом Modal
Нижеприведённый сценарий JavaScript не представляет собой ничего сложного – это обычная функция-конструктор. Её назначение создание и управление модальными окнами Bootstrap.
var ModalApp = {};
ModalApp.ModalProcess = function (parameters) {
this.id = parameters || 'modal';
this.selector = parameters || '';
this.title = parameters || 'Заголовок модального окна';
this.body = parameters || 'Содержимое модального окна';
this.footer = parameters || '<button type="button" class="btn btn-default" data-dismiss="modal">Закрыть</button>';
this.content = '<div id="'+this.id+'" class="modal fade" tabindex="-1" role="dialog">'+
'<div class="modal-dialog" role="document">'+
'<div class="modal-content">'+
'<div class="modal-header">'+
'<button type="button" class="close" data-dismiss="modal" aria-label="Close"><span aria-hidden="true">×</span></button>'+
'<h4 class="modal-title">'+this.title+'</h4>'+
'</div>'+
'<div class="modal-body">'+this.body+'</div>'+
'<div class="modal-footer">'+this.footer+'</div>'+
'</div>'+
'</div>'+
'</div>';
this.init = function() {
if ($('#'+this.id).length==0) {
$('body').prepend(this.content);
}
if (this.selector) {
$(document).on('click',this.selector, $.proxy(this.showModal,this));
}
}
}
ModalApp.ModalProcess.prototype.changeTitle = function(content) {
$('#' + this.id + ' .modal-title').html(content);
};
ModalApp.ModalProcess.prototype.changeBody = function(content) {
$('#' + this.id + ' .modal-body').html(content);
};
ModalApp.ModalProcess.prototype.changeFooter = function(content) {
$('#' + this.id + ' .modal-footer').html(content);
};
ModalApp.ModalProcess.prototype.showModal = function() {
$('#' + this.id).modal('show');
};
ModalApp.ModalProcess.prototype.hideModal = function() {
$('#' + this.id).modal('hide');
};
ModalApp.ModalProcess.prototype.updateModal = function() {
$('#' + this.id).modal('handleUpdate');
};
Чтобы не «засорять» глобальное пространство, создание объектов производится в рамках объекта .
Для более удобного подключения данного функционала можете воспользоваться следующими файлами:
- control-modal.js — не сжатая версия скрипта для динамического создания модальных окон Bootstrap 3;
- control-modal.min.js — сжатая (минимизированная) версия скрипта размером 1,49 КБ.
- control-modal-b4.js и control-modal-b4.min.js — для Bootstrap 4.
Optional Sizes#
You can specify a bootstrap large or small modal by using the «size» prop.
Small modal Large modal
function Example() {
const = useState(false);
const = useState(false);
return (
<>
<Button onClick={() => setSmShow(true)}>Small modal</Button>{‘ ‘}
<Button onClick={() => setLgShow(true)}>Large modal</Button>
<Modal
size=»sm»
show={smShow}
onHide={() => setSmShow(false)}
aria-labelledby=»example-modal-sizes-title-sm»
>
<Modal.Header closeButton>
<Modal.Title id=»example-modal-sizes-title-sm»>
Small Modal
</Modal.Title>
</Modal.Header>
<Modal.Body>…</Modal.Body>
</Modal>
<Modal
size=»lg»
show={lgShow}
onHide={() => setLgShow(false)}
aria-labelledby=»example-modal-sizes-title-lg»
>
<Modal.Header closeButton>
<Modal.Title id=»example-modal-sizes-title-lg»>
Large Modal
</Modal.Title>
</Modal.Header>
<Modal.Body>…</Modal.Body>
</Modal>
</>
);
}
render(<Example />);
functionExample(){

constsmShow, setSmShow=useState(false);

constlgShow, setLgShow=useState(false);

return(

<>

<ButtononClick={()=>setSmShow(true)}>Small modal</Button>{' '}

<ButtononClick={()=>setLgShow(true)}>Large modal</Button>

<Modal

size="sm"

show={smShow}

onHide={()=>setSmShow(false)}

aria-labelledby="example-modal-sizes-title-sm"

>

<Modal.HeadercloseButton>

<Modal.Titleid="example-modal-sizes-title-sm">
            Small Modal
</Modal.Title>

</Modal.Header>

<Modal.Body>...</Modal.Body>

</Modal>

<Modal

size="lg"

show={lgShow}

onHide={()=>setLgShow(false)}

aria-labelledby="example-modal-sizes-title-lg"

>

<Modal.HeadercloseButton>

<Modal.Titleid="example-modal-sizes-title-lg">
            Large Modal
</Modal.Title>

</Modal.Header>

<Modal.Body>...</Modal.Body>

</Modal>

</>

);

}

render(<Example/>);
Sizing modals using custom CSS
You can apply custom css to the modal dialog div using the «dialogClassName» prop. Example is using a custom css class with width set to 90%.
Custom Width Modal
function Example() {
const = useState(false);
return (
<>
<Button variant=»primary» onClick={() => setShow(true)}>
Custom Width Modal
</Button>
<Modal
show={show}
onHide={() => setShow(false)}
dialogClassName=»modal-90w»
aria-labelledby=»example-custom-modal-styling-title»
>
<Modal.Header closeButton>
<Modal.Title id=»example-custom-modal-styling-title»>
Custom Modal Styling
</Modal.Title>
</Modal.Header>
<Modal.Body>
<p>
Ipsum molestiae natus adipisci modi eligendi? Debitis amet quae unde
commodi aspernatur enim, consectetur. Cumque deleniti temporibus
ipsam atque a dolores quisquam quisquam adipisci possimus
laboriosam. Quibusdam facilis doloribus debitis! Sit quasi quod
accusamus eos quod. Ab quos consequuntur eaque quo rem! Mollitia
reiciendis porro quo magni incidunt dolore amet atque facilis ipsum
deleniti rem!
</p>
</Modal.Body>
</Modal>
</>
);
}
render(<Example />);
functionExample(){

constshow, setShow=useState(false);

return(

<>

<Buttonvariant="primary"onClick={()=>setShow(true)}>
        Custom Width Modal
</Button>

<Modal

show={show}

onHide={()=>setShow(false)}

dialogClassName="modal-90w"

aria-labelledby="example-custom-modal-styling-title"

>

<Modal.HeadercloseButton>

<Modal.Titleid="example-custom-modal-styling-title">
            Custom Modal Styling
</Modal.Title>

</Modal.Header>

<Modal.Body>

<p>

            Ipsum molestiae natus adipisci modi eligendi? Debitis amet quae unde

            commodi aspernatur enim, consectetur. Cumque deleniti temporibus
            ipsam atque a dolores quisquam quisquam adipisci possimus
            laboriosam. Quibusdam facilis doloribus debitis! Sit quasi quod

            accusamus eos quod. Ab quos consequuntur eaque quo rem! Mollitia
            reiciendis porro quo magni incidunt dolore amet atque facilis ipsum
            deleniti rem!

</p>

</Modal.Body>

</Modal>

</>

);

}

render(<Example/>);
How it works
Before getting started with Bootstrap’s modal component, be sure to read the following as our menu options have recently changed.
- Modals are built with HTML, CSS, and JavaScript. They’re positioned over everything else in the document and remove scroll from the so that modal content scrolls instead.
- Clicking on the modal “backdrop” will automatically close the modal.
- Bootstrap only supports one modal window at a time. Nested modals aren’t supported as we believe them to be poor user experiences.
- Modals use , which can sometimes be a bit particular about its rendering. Whenever possible, place your modal HTML in a top-level position to avoid potential interference from other elements. You’ll likely run into issues when nesting a within another fixed element.
- One again, due to , there are some caveats with using modals on mobile devices. for details.
- Lastly, the HTML attribute has no affect in modals. Here’s how you can achieve the same effect with custom JavaScript.
Keep reading for demos and usage guidelines.
Due to how HTML5 defines its semantics, the autofocus HTML attribute has no effect in Bootstrap modals. To achieve the same effect, use some custom JavaScript:
Usage
The modal plugin toggles your hidden content on demand, via data attributes or JavaScript. It also adds to the to override default scrolling behavior and generates a to provide a click area for dismissing shown modals when clicking outside the modal.
Via data attributes
Activate a modal without writing JavaScript. Set on a controller element, like a button, along with a or to target a specific modal to toggle.
Options
Options can be passed via data attributes or JavaScript. For data attributes, append the option name to , as in .
| Name | Type | Default | Description |
|---|---|---|---|
| backdrop | boolean or the string | true | Includes a modal-backdrop element. Alternatively, specify for a backdrop which doesn’t close the modal on click. |
| keyboard | boolean | true | Closes the modal when escape key is pressed |
| focus | boolean | true | Puts the focus on the modal when initialized. |
| show | boolean | true | Shows the modal when initialized. |
Methods
Activates your content as a modal. Accepts an optional options .
Manually toggles a modal. Returns to the caller before the modal has actually been shown or hidden (i.e. before the or event occurs).
Manually opens a modal. Returns to the caller before the modal has actually been shown (i.e. before the event occurs).
Manually hides a modal. Returns to the caller before the modal has actually been hidden (i.e. before the event occurs).
Events
Bootstrap’s modal class exposes a few events for hooking into modal functionality. All modal events are fired at the modal itself (i.e. at the ).
| Event Type | Description |
|---|---|
| show.bs.modal | This event fires immediately when the instance method is called. If caused by a click, the clicked element is available as the property of the event. |
| shown.bs.modal | This event is fired when the modal has been made visible to the user (will wait for CSS transitions to complete). If caused by a click, the clicked element is available as the property of the event. |
| hide.bs.modal | This event is fired immediately when the instance method has been called. |
| hidden.bs.modal | This event is fired when the modal has finished being hidden from the user (will wait for CSS transitions to complete). |
Explanation of Code
To activate a Bootstrap modal via data attributes we basically need two components — the controller element like a button or link, and the modal element itself.
- The outermost container of every modal in a document must have a unique id (in this case , line no-5), so that it can be targeted via (for buttons) or (for hyperlinks) attribute of the controller element (line no-2).
- The attribute is required to add on the controller element (line no-2), like a button or an anchor, along with a attribute or to target a specific modal to toggle.
- The class (line no-6) sets the width as well as horizontal and vertical alignment of the modal box. Whereas the class sets the styles like text and background color, borders, rounded corners etc.
Rest of the thing is self explanatory, such as the element defines a header for the modal that usually contains a modal title and a close button, whereas the element contains the actual content like text, images, forms etc. and the element defines the footer that typically contains action buttons for the user.
Note: The class on the element adds a fading and sliding animation effect while showing and hiding the modal window. If you want the modal that simply appear without any effect you can just remove this class. Also, when modals become too long for the user’s viewport or device, they scroll independent of the page itself.
Activating Bootstrap Modals with jQuery
The modal is a jQuery plugin, so if you want to control the modal using jQuery, you need to call the function on the modal’s selector. For Example:
The “options” here would be a JavaScript object that can be passed to customize the behavior. For example:
Available options include:
- backdrop: This can be either or . This defines whether or not you want the user to be able to close the modal by clicking the background.
- keyboard: if set to the modal will close via the ESC key.
- show: used for opening and closing the modal. It can be either or .
- focus: puts the focus on the modal when initialized. It can be either true or false and is set to by default.
.modal(‘handleUpdate’)
Этот метод перенастраивает положение модального слоя, чтобы противостоять рывку, возникающему из-за появления полосы прокрутки в области просмотра, в случае, если высота модального окна изменяется таким образом, что она становится выше, чем высота области просмотра, когда она открыта.
Типичным примером этого сценария является показ скрытых элементов внутри модального окна с помощью JavaScript или загрузка содержимого внутри модального окна с помощью Ajax после активации.
<script>
$(document).ready(function(){
    $(".show-text").click(function(){
        $('#myModal').find(".lots-of-text").toggle();
        $('#myModal').modal('handleUpdate')
    });
});
</script>
How it works
Before getting started with MDB modal component, be sure to read the following as our menu
options have recently changed.
-
Modals are built with HTML, CSS, and JavaScript. They’re positioned over everything else in
the document and remove scroll from the
so that modal content scrolls instead. - Clicking on the modal “backdrop” will automatically close the modal.
-
Bootstrap only supports one modal window at a time. Nested modals aren’t supported as we
believe them to be poor user experiences. -
Modals use , which can sometimes be a bit particular about its
rendering. Whenever possible, place your modal HTML in a top-level position to avoid
potential interference from other elements. You’ll likely run into issues when nesting a
within another fixed element. -
Once again, due to , there are some caveats with using modals on
mobile devices.
Параметры
Существуют определенные параметры, которые можно передать методу для настройки функциональности модального режима. Опции могут быть переданы через data-* атрибуты или JavaScript.
Для настройки модальных опций с помощью data-* атрибутов просто добавьте имя опции к -, например , и т. д.
| Имя | Тип | Значение по умолчанию | Описание |
|---|---|---|---|
| backdrop | booleanили string | true | Включает элемент модального фона (черная область наложения). В качестве альтернативы, вы можете указать фон, который не закрывает модальное окно при щелчке. |
| keyboard | boolean | true | Закрывает модальное окно при нажатии клавиши ESC. |
| focus | boolean | true | Устанавливает на модальном окне при инициализации. |
| show | boolean | true | Показывает модальное окно при инициализации или активации. |
Data-* атрибуты обеспечивают простой способ установки параметров модальных окон, однако JavaScript является наиболее предпочтительным способом, поскольку он предотвращает повторный вызов функций.
В следующем примере мы установили для параметра фон , что предотвращает закрытие модального окна при щелчке за пределами модального объекта, то есть черной области наложения.
<!-- HTML-код кнопки (триггер модального окна) -->
<button type="button" class="btn btn-lg btn-primary" data-target="#myModal" data-toggle="modal">Показать модальное окно</button>

<!-- HTML-код модального окна -->
<div id="myModal" class="modal fade" data-backdrop="static" tabindex="-1">
    <div class="modal-dialog">
        <div class="modal-content">
            <div class="modal-header">
                <h5 class="modal-title">Подтверждение</h5>
                <button type="button" class="close" data-dismiss="modal">×</button>
            </div>
            <div class="modal-body">
                <p>Вы хотите сохранить изменения в этом документе перед закрытием?</p>
                <p class="text-secondary"><small>Если вы не сохраните, ваши изменения будут потеряны.</small></p>
            </div>
            <div class="modal-footer">
                <button type="button" class="btn btn-secondary" data-dismiss="modal">Закрыть</button>
                <button type="button" class="btn btn-primary">Сохранить изменения</button>
            </div>
        </div>
    </div>
</div>